
Skip to main content
How Can we Help You?
Install and Activate TailDesk
TailDesk is installed as a WordPress plugin. Follow the steps below to install and activate TailDesk on your website.
Before you start
- Make sure you can log in to your WordPress dashboard with an administrator account.
Install TailDesk
- Log in to your WordPress dashboard.
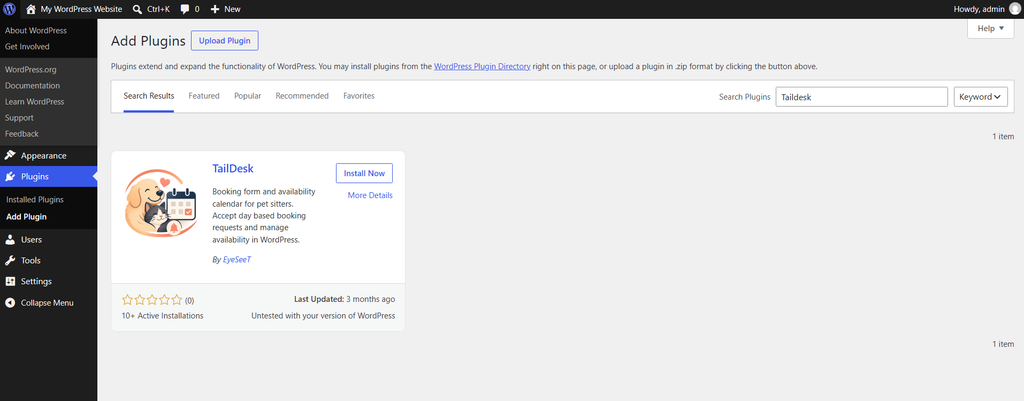
- Go to Plugins → Add New Plugin.
- Type Taildesk in the search box.
- Click Install Now.
- When the installation is complete, click Activate Plugin.
Install TailDesk Pro
If your license includes TailDesk Pro, install it after the main TailDesk plugin.
- Download de Pro Plugin From https://eyeseet.nl/account
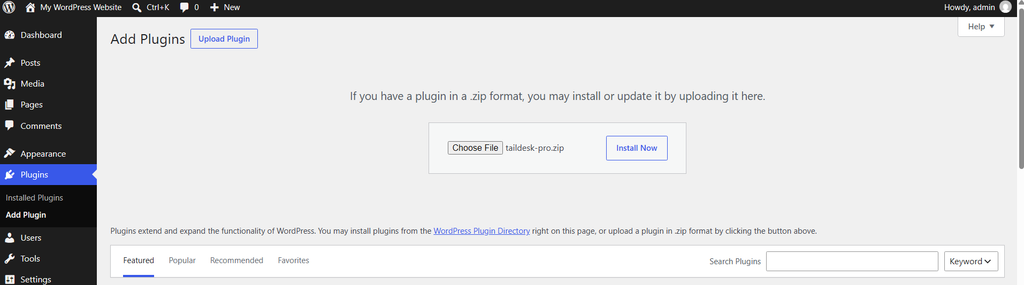
- Go to Plugins → Add New Plugin and click Upload Plugin.
- Select taildesk-pro.zip.
- Click Install Now.
- Activate TailDesk Pro after the installation has finished by entering your licence code from https://eyeseet.nl/account
Check that TailDesk is active
Open the Plugins screen in WordPress and confirm that TailDesk is shown as active. If you installed TailDesk Pro, confirm that it is active as well.
Once TailDesk is active, you are ready to create your first service.